When you hear the word “literacy,” your mind probably jumps straight to letter identification, phonics, and reading instruction. But literacy isn’t just about books and sight words. Literacy takes on an entirely new meaning for our students who need explicit functional instruction. Literacy for these students is about understanding the world around them, especially when it comes to recognizing community signs that provide essential information for navigating everyday life.
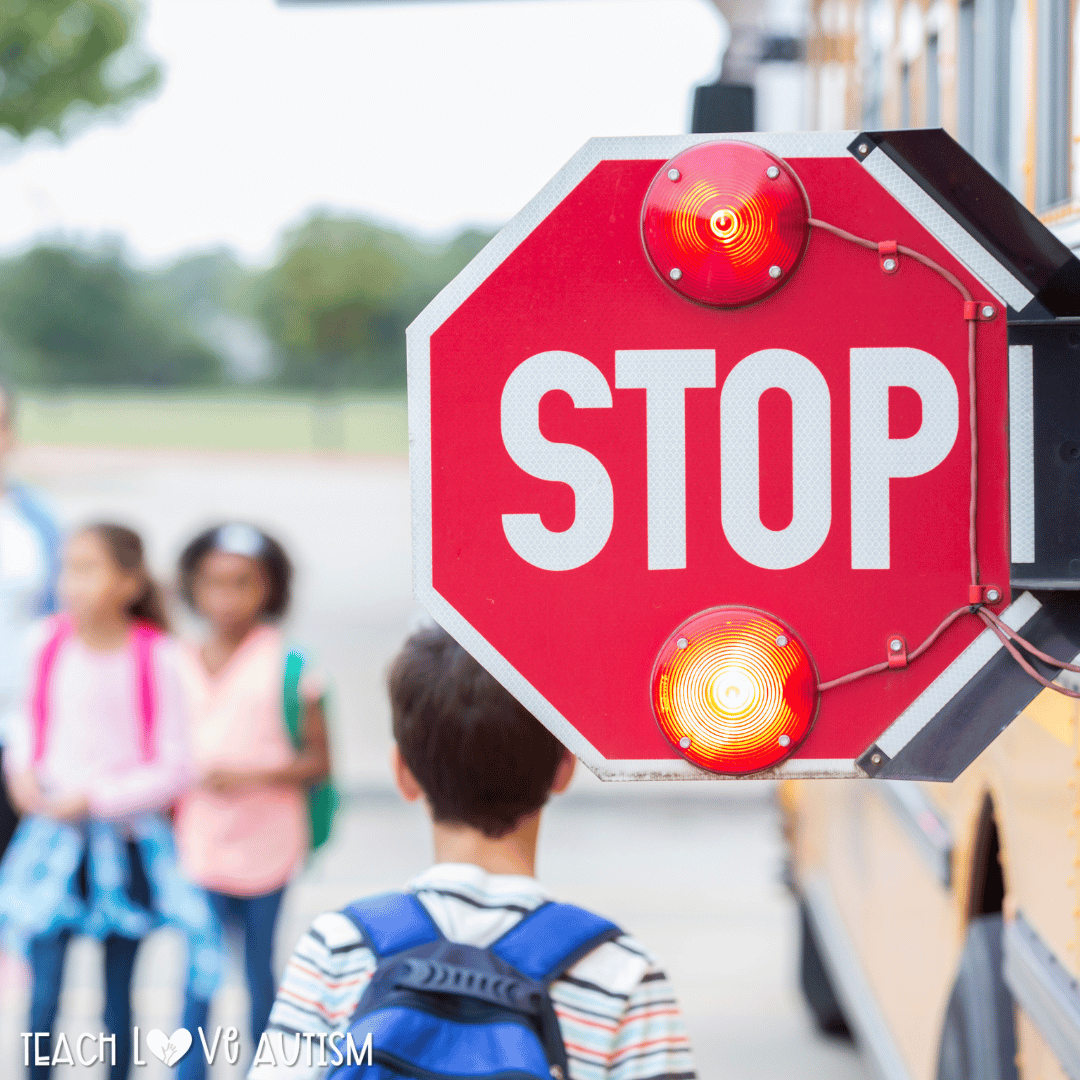
Teaching community signs is an evidence-based practice critical for special education classrooms (Bates, Cuvo, Miner, & Korabek, 2001). Whether it’s recognizing a STOP sign at a crosswalk, identifying a restroom sign, or understanding an EXIT sign in a public space, these signs help our students become more independent and confident as they move through their communities.
While real-world practice is the best way to teach these skills, we need structured, engaging classroom activities to introduce and reinforce them. That’s exactly why I created one of my favorite resources, the Community Signs Interactive Bulletin Board. Don’t let the title fool you because this resource is so much more than just a bulletin board!
Why Teaching Community Signs Is Essential
Think about how many signs you encounter daily without even realizing it. The sign directs you to the restroom, the crosswalk indicator at a busy intersection, or the “Do Not Enter” warning at a restricted area. Now imagine not knowing what these signs mean. It would make navigating daily life confusing and even unsafe.
For our students, recognizing and understanding community signs is a vital life skill. It allows them to make safe choices, follow directions, and gain independence. Whether our students are walking in their neighborhood, traveling with family, or learning to use public transportation, they must understand what these signs mean and why they matter. By explicitly teaching community signs in the classroom, we give our students the tools to interact with the world around them safely and confidently.
What’s Included in the Community Signs Interactive Bulletin Board?
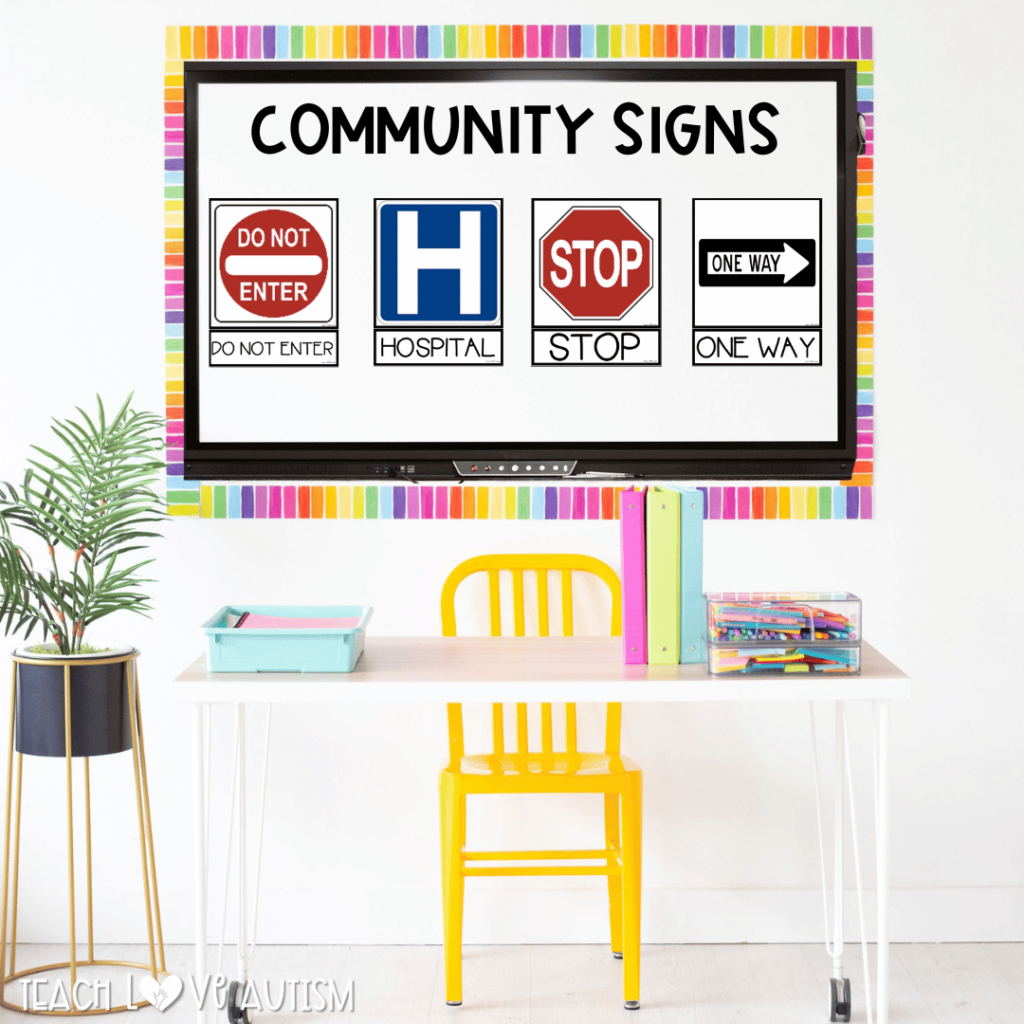
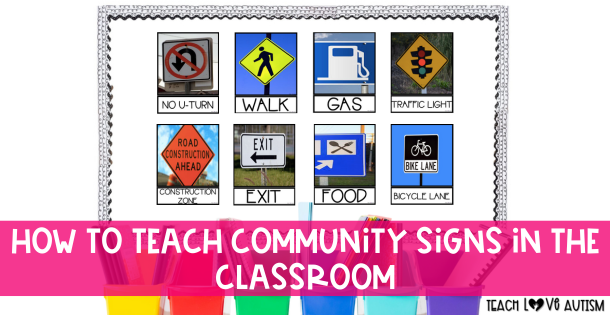
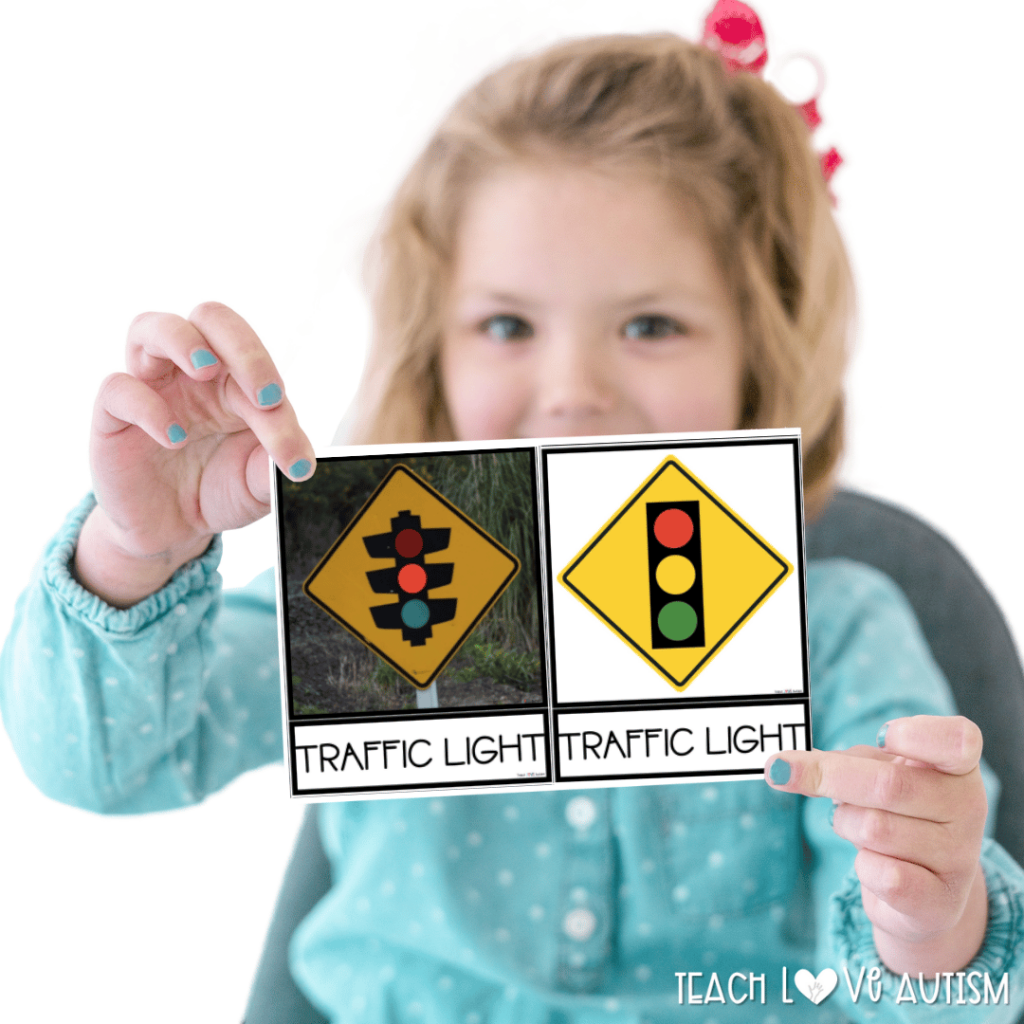
This resource includes 30 of the most commonly used community signs, represented in both clipart and real photographs. Using real photos is especially helpful for generalization. This ensures that students recognize signs in different settings and designs.
The set is designed to be interactive and adaptable to different learning styles. Students can:
- Match identical signs
- Match non-identical signs
- Label each sign
- Use the signs in functional literacy tasks
To complete the bulletin board, I also included headers in multiple sizes. I love printing them on Astrobrights paper to give the board a pop of color!
Using Real Photos for Better Generalization
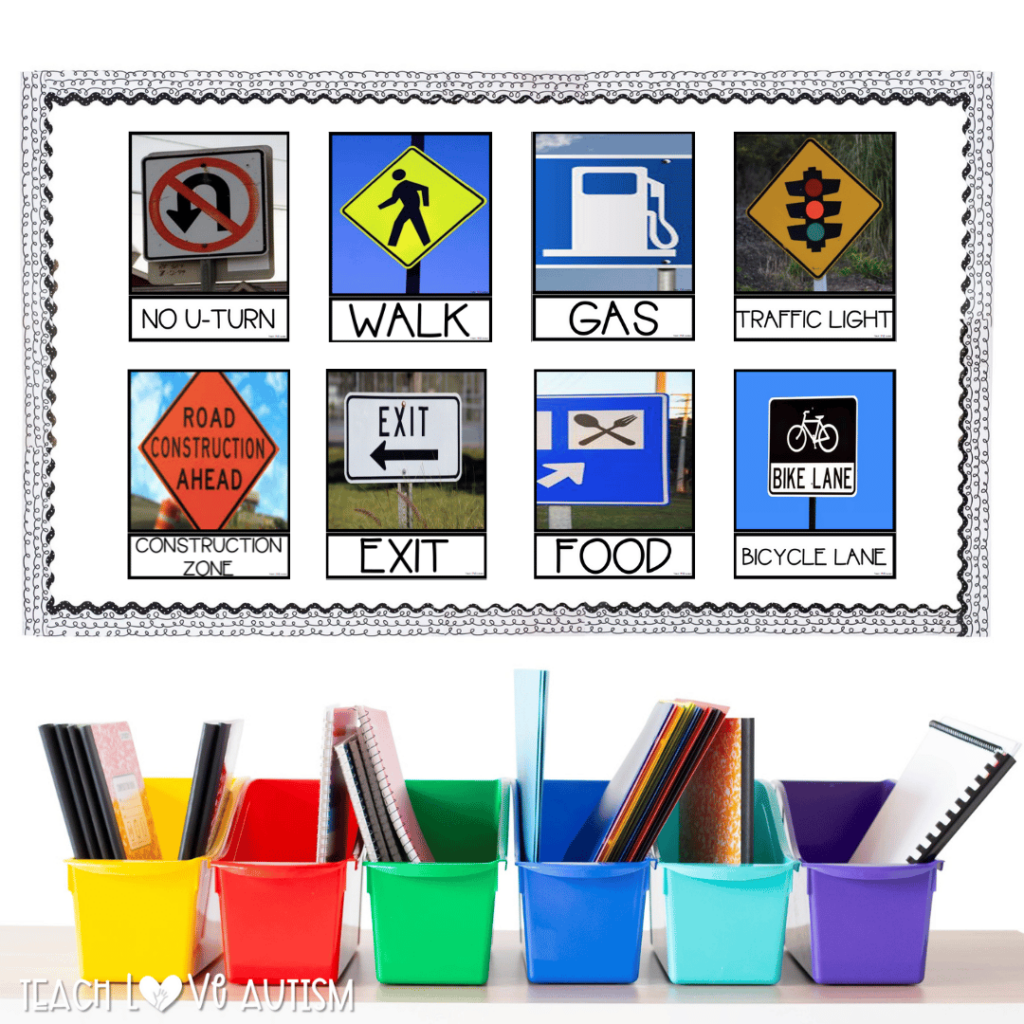
One of the best ways to make a community signs lesson more effective is by using real photos. Generic icons are helpful, but our students connect more when seeing actual signs from real-world settings. A stop sign in clipart might look slightly different than one at an intersection. Showing multiple real-world examples helps our students recognize the sign no matter where they see it.
This approach is especially helpful for our students who struggle with abstract thinking, have difficulty generalizing skills across settings, or need explicit instruction to recognize sign variations. Adding real photos of local community signs can make the learning experience even more personalized. If possible, take pictures of actual signs in your school or neighborhood and add them to your bulletin board.
Making the Most of Printer Settings for Custom Work Tasks
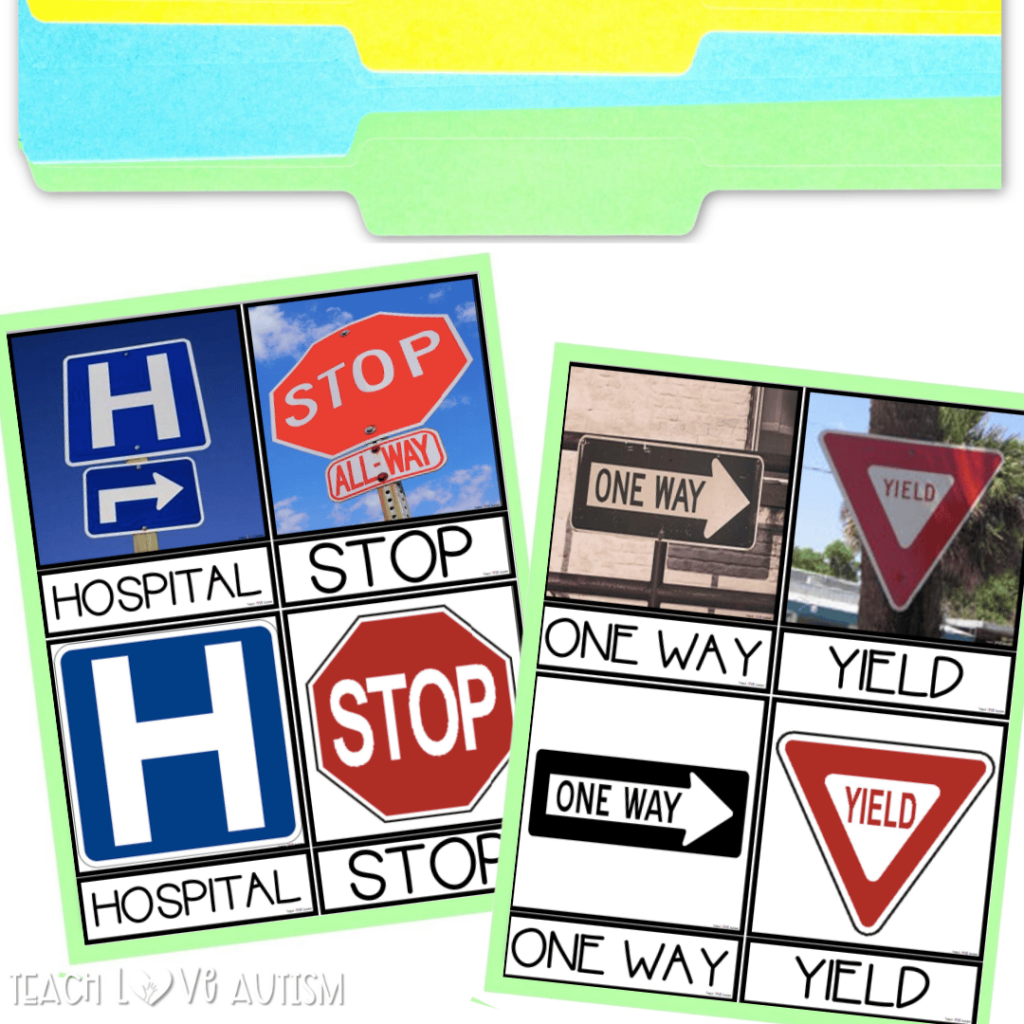
I love it when I can take a single resource and use it in multiple ways. With a simple tweak to your printer settings, you can customize these community signs into smaller, individual work tasks!
Here’s a quick trick: select “multiple pages per sheet” in your settings when printing. This will shrink the images, allowing you to create:
- Small flashcards for matching games
- File folder activities for independent work
- Portable keyrings for on-the-go practice
This feature makes the resource flexible for different classroom setups while reinforcing the same essential skills.
How to Use Community Signs in Your Classroom
Turn It Into an Interactive Center
Set up the Community Signs Bulletin Board as a learning station where your students can practice matching identical or non-identical signs. Encourage them to say the name of the sign and explain its purpose to reinforce comprehension.
Incorporate Movement with a Scavenger Hunt
Make learning fun by bringing the lesson to life! Hide printed community signs around the classroom or school building and have your students search for them. Once they find a sign, they can:
- Say what it is
- Describe where they’ve seen it in real life
- Explain why it’s important
This activity adds a kinesthetic learning component. It keeps your students engaged while reinforcing real-world connections.
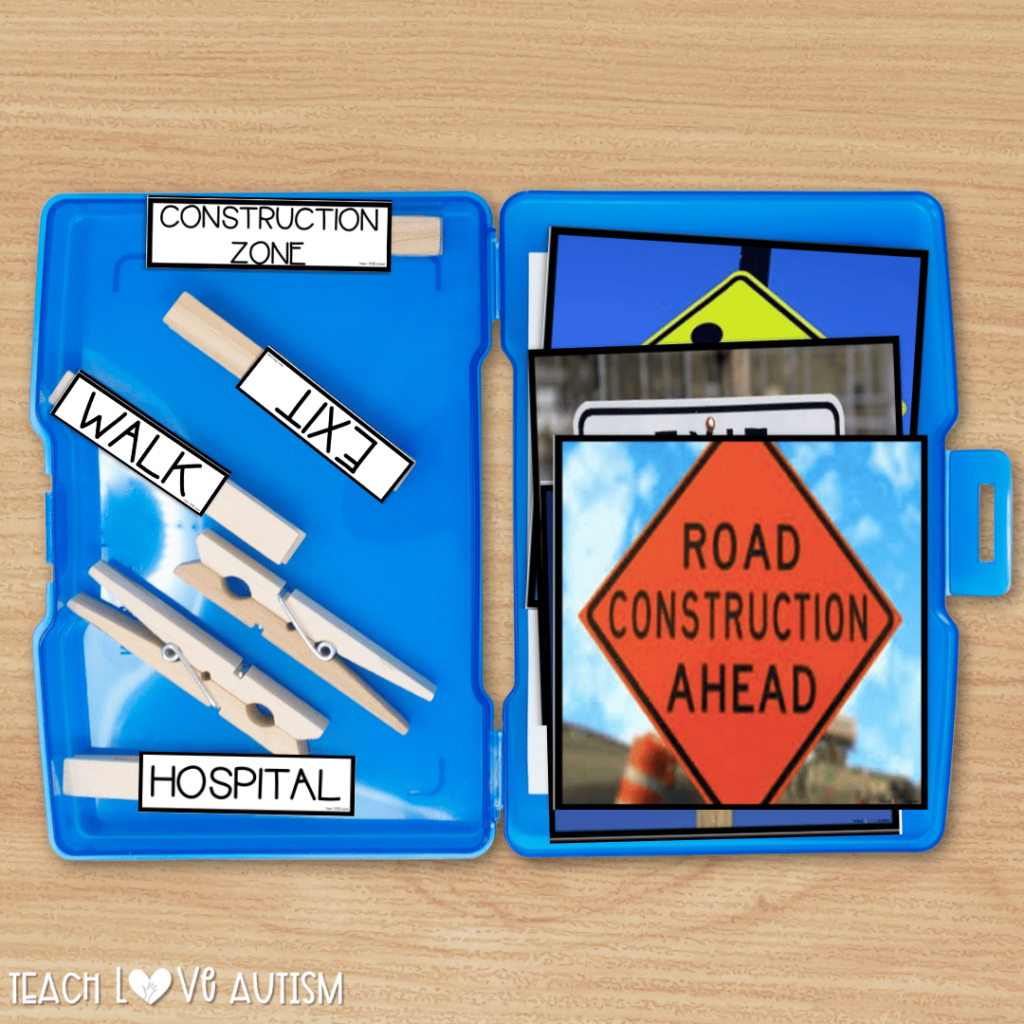
Create Matching Clip Cards
Cut off the names from the printed signs and attach them to clothespins. Then, your students can clip the correct name onto the matching sign. This adds a fine motor skills component. This approach also builds independence while reinforcing vocabulary.
Use in Morning Work and Independent Work Stations
Since the bulletin board is interactive, it doubles as a morning work or as an independent task station. Your students can complete:
- Matching activities
- Labeling tasks
- Sentence-building exercises using the signs
This ensures they practice community sign recognition daily.
Additional Resources
If you’re looking for even more ways to build independence in your classroom, I’ve got you covered! The community signs interactive bulletin board is just one of the resources that can help create structured, engaging, independent workstations. Whether you’re setting up a dedicated work task area or integrating independent activities throughout the day, these materials will help make learning functional and meaningful.
- 5 Steps to Launch Independent Work Task Stations
- 5 Easy Task Box Ideas for Independent Work Stations
Ready to Bring Community Signs Into Your Classroom?
If you’re looking for a fun, engaging, and highly adaptable way to teach community signs, my interactive bulletin board is the perfect solution. It can be used as a bulletin board display, an independent work task, a matching center, or a functional literacy station. No matter how you incorporate it, this resource will support your students as they develop real-world literacy skills that will stay with them for life.
Save for Later
Remember to save this post to your favorite Special Education Pinterest board for quick access to this effective resource for community signs!