5 Steps to Launch Independent Work Task Stations
Sharing is caring!

The first week of school sets the foundation for the entire academic year and independent work is part of that. It’s an opportunity to establish routines, build relationships, and create an environment that fosters independence for special education students. One effective strategy is implementing independent work stations, which empower students to work autonomously while developing crucial life and functional skills. In these work stations are what I call work tasks.
These are materials for independent work sometimes stored in bins, binders, or file folders. They can be as simple as task cards, worksheets, or velcro tasks too. I’ve even made them digital by assigning a table with an iPad or computer at it with things to work on such as Boom Cards. They work on all types of skills including reading, math, functional skills, life skills, and more. In this blog post, I’ll walk you through the beginning steps of launching independent work stations with special education students, ensuring a smooth and successful start to the school year.
Step 1: Assess Individual Needs

Understanding the unique abilities and challenges of each student is paramount. This starts with getting to know your students through reading their IEPs, completing interest surveys with students and parents, and even speaking with previous teachers. I also recommend you conduct individual assessments to identify their strengths, interests, and areas that require additional support.
Consider factors such as learning styles, sensory preferences, and attention spans. This information will guide you in tailoring the workstations to meet their diverse needs effectively for each student. Remember the work that each student gets must be individualized.
Previously in my classroom, I implemented a strategy for independent work. During the initial week or two of the school year, I conducted a whole group lesson with my students and paraprofessionals. I would gather the work tasks or binders and bring them to the table where the students and staff were present. We would distribute the tasks among ourselves, observing if the students could complete them independently. My paraprofessionals and I would then proceed to circulate the room with a clipboard and data sheet, recording the task name/type and the level of independence displayed by each student. This enabled me to confidently assign tasks according to each student’s ability, subsequently minimizing disruptive behaviors during our fully engaged station activities.
Here’s the datasheet we use:
Each student needs to have something motivating to work for after the completion of the tasks.
Step 2: Define Clear Objectives for Independent Work
Establish clear learning objectives for each work station and the tasks that are inside it. Align these objectives with the curriculum and individual goals for your special education students. Ensure that the tasks are age-appropriate, engaging, and provide opportunities for skill development. This includes areas such as reading, math, communication, and social skills. By setting specific goals, you lay the foundation for meaningful and purposeful independent work.
It is important to choose tasks that your student can do independently, without any assistance or prompts. These tasks should ideally be skills that the student has already mastered. Initially, it is crucial to make the tasks as easy as possible for students to complete, so they can become familiar with the process. If you want to learn more about paraprofessional run stations with students, you can find additional information here. This is where we focus on developing new skills and working towards IEP goals.
Step 3: Design the Work Stations

Now comes the exciting part – designing the work stations! Consider the following elements:
a) Organization:
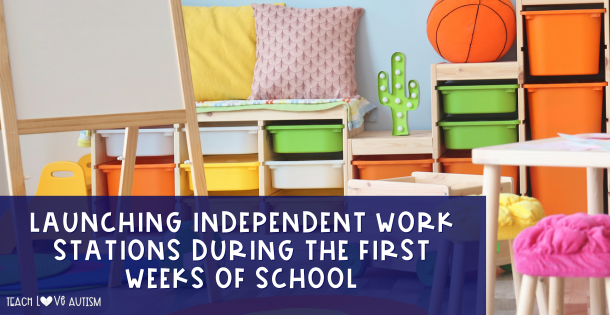
Arrange each work station in a dedicated area of the classroom. Clearly label materials, supplies, and instructional aids to facilitate independent access. Ensure that the layout is conducive to focus and minimizes distractions. I liked having tables spaced out in the classroom within sight of an adult but not too close so that the student would become dependent on that adult to do the task. Also, have storage for the tasks you want students to complete. I have used 3 drawer Rubbermaid organizers, multiple-drawer rolling carts, shelves, and cabinets in most situations. Milk crates tied with zip ties can make an easy set of shelves in a pinch on the cheap to put next to a desk!
b) Visual Supports:
Incorporate visual aids, such as picture schedules, task lists, visual instructions, and first-then boards. This will provide students with clear guidance and reinforce routines. A must-have is the list of tasks that you want the students to complete. You can find a set here that I used in my classroom. Visual supports enhance understanding, promote independence, and help students transition smoothly between work stations.
c) Materials and Resources:
Select materials and resources that align with the learning objectives of each work station. If you have a life skills workstation, then have things like sorting silverware, stocking small shelves, and matching household items. Include manipulatives, worksheets, technology tools, and any other necessary resources so that students will not need your help while completing the task. Provide a variety of options to accommodate different learning styles and abilities. Many times I get asked what to use with students who are just learning to work independently or are very young. I have found that put-in tasks are the easiest type to work on at first, then you can move to matching, sorting, and more.
Need some items to get you started? Check out my shop for materials that I put in my independent work systems.
Step 4: Teach Expectations and Procedures for Independent Work
Often overlooked, the following step may appear simple to assign students to a table and have them work on tasks they have already mastered. However, it is crucial to provide our students with thorough instruction on this matter. It is essential to explicitly teach the expectations and procedures associated with each workstation. Demonstrating and modeling the proper use of materials, task completion, and adherence to established routines is vital. Students should be shown the process of transitioning to the workstation, selecting a task, opening the task container, completing the task, placing it in the appropriate area, and determining the subsequent task to work on.
Demonstrate to them the process of completing tasks and accessing rewards or break items independently. Use social stories or role-playing to reinforce proper conduct and promote self-reliance. Ensure to give explicit instructions and initial support. In my practice, I usually conduct a week-long group lesson with my paraprofessionals and students to initiate this.
Step 5: Gradual Release of Responsibility
Gradually transition from teacher-led instruction to independent work. Begin by working closely with students at the workstations, providing guidance and support as needed. Over time, gradually decrease your involvement and encourage students to work autonomously. Monitor their progress and offer feedback to promote growth and development.
Use these for keeping data all year on student’s ability to work independently:
Launching independent workstations in the first week of school empowers special education students to take ownership of their learning journey. By assessing individual needs, setting clear objectives, designing effective workstations, teaching expectations, and gradually fostering independence, you lay a strong foundation for their academic success and personal growth.
Remember, each student is unique, and it’s essential to adapt and modify the workstations as necessary. Flexibility, patience, and ongoing assessment will help you refine and improve your approach. By nurturing independence, you’re creating an inclusive classroom environment where every special education student can thrive and reach their full potential.


